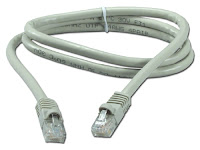
 Setting up the wiring of your network operations centre (or the rest of your facility) for network access requires a fair bit of work. If you want to make sure the work is done only once, it also requires some planning. There are entire courses on how to set up a properly configured network; this article is not a substitute for one, but should give you the bare bones basics.
First, the old adage of carpenters of "measure twice and cut once" applies to cables, and to configuring your network. Unless you have an excellent reason to do so otherwise, you'll want a hub-and-spoke (or star) configuration for your network. This puts a central router at each network node that has cables running to each machine. This is the standard and has been for going on 20 years, since commodity routers became cheap. Its advantages are that so long as the router is up, one machine going down or losing connections does not impact the others on the same switch; it's also much easier to troubleshoot - if everyone is off the net, it's the router.
When running your physical cable plant out, remember the differences in types of cables, and their transmission lengths. Never run a cable to its full transmission length; 90 to 95% is a good safe point to start; this leaves you with room to be selective in placing the computers in the room.
When running cable out, remember that cable is (despite all appearances) fragile. Don't put more than 10 kg of pull stress on it, avoid bending the cable to a curve tighter than 4x it's diameter (so for a 7.5 mm diameter cable, no curve should be tighter than 30 cm, and absolutely avoid kinking it, crushing it, stepping on it, rolling a chair over it, or rolling a cart over it, or otherwise flattening it out. Doing so can break the insulators inside the cable where you can't see them, and troubleshooting that is a pure pain.
When terminating cables don't strip more than 25mm of housing from the end of the cable. Make sure your terminating connectors are solidly constructed and haven't been damaged. (Cable pros tend to have a crimper on their belt and terminate after running them out. When tying down cables, do so loosely and don't put the ties at regular intervals - leave some slack. If you're suspending cables, use broad supports rather than narrow hooks; the weight of the cable on a narrow hook can be sufficient to crush it over time. Don't assume that ceiling tiles can support cables, and route them as far away as possible from light fixtures or other items that use electricity along the length of the cable; this cuts down on interference. (The European standard cabling run has fewer issues with this, because the cable is shielded from stray electromagnetic phenomena).
Once the cable's installed, it's not entirely maintenance free, but it's close, so the first thing you do once it's done is document it. Take a floor plan and draw out with coloured pens where all the cable runs are, and ID them. Make two copies and store one in a safe place. Whenever you pull new cable (and you will) update the document to preserve the sanity of whomever has to deal with it again. What makes sense to you now and is blindingly obvious now will look like a plate of coloured spaghetti in four months.
When in doubt, replace rather than patch or mend. Cable is cheap and the time you think you're saving is usually illusory.

0 comments:
Post a Comment