 As soon as I downloaded Service Pack 2 for Windows 2000, I immediately wanted to slipstream it into my install files. For those of you that don't know what slipstreaming is, read about it and how to do it here. The one thing that kept bugging me was that I couldn't create a Win2K install CD with SP2 slipstreamed in that was also bootable. Sure I could have just fired up Nero, and make it bootable with a WinME startup floppy, but there's disadvantages to that. One, I'd have to run setup in DOS mode which can be very slow. Second, if I have my bios to boot from my CD first, and I leave it in there, it will automatically boot from it without even asking (unlike an offical retail copy, which will tell you to press any key to boot from the CD, else it'll boot from your hard drive).
So I set out in search of an answer. I searched on multiple forums, all I found was countless people wanting to know how to do the same thing, but with no answers (except the few saying "use Nero/Easy CD, it lets you make a bootable CD!"). Finally I was able to piece together enough info to try it out. The first few tries were unsuccessful. About 10 hours later I finally did it! I was able to modify my Win2K setup files, burn them back to a CD, AND make the CD bootable just like my original. Here's how I did it:
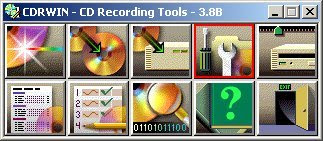
First, you need the bootable sector from your CD. You can either extract it yourself (instructions here) or download the boot.bin file here. Save it in a directory other than your Win2K files (such as a temp directory). Second, you MUST use CDRWIN. I tried Nero and Easy CD Creator with no luck. It seems to be the only burner that supports making a CD bootable without emulation. If you don't have it, you can download it here. Start it up, and click on the "File Backup and Tools" button. *Note: New versions of Nero and Easy CD will now let you burn bootable CDs without emulation. They may work, but if not please use CDRWIN and these instructions, before you ask for help. *Note #2: Some people, including me, have had problems using CDRWIN 3.8d, I would recommend using 3.8b instead.
Now you will be presented with a screen like this:
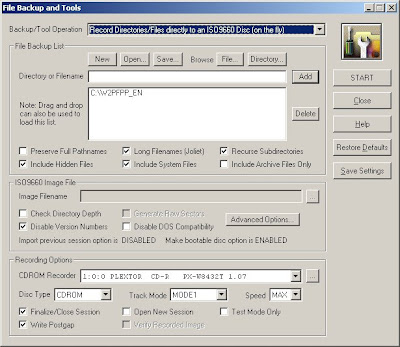
Make sure that your settings are EXACTLY the same. The only things you may want to change are:
* For Backup/Test Operation, set it to "Build an ISO9660 Image File" if you want to create an image file. I recommend burning the CD first and if it works, then you can worry about making an image file. Set it to "Build and Record an ISO9660 Image File" only if you are copying the setup files from a CD (perhaps you already slipstreamed SP1 into the Win2K files and made a CD, but now you want it bootable?).
* In the file box, you want to add ONLY the directory that contains the files you copied from your Win2K CD. Don't add each file/directory separately, trust me you'll have problems. Inside this directory should be every file found on the Win2K cd, not just the I386 directory. If you are copying the files from a CD, you want to check the "Preserve Full Pathnames" option (trust me on this, it isn't like dragging and dropping in Nero or Easy CD).
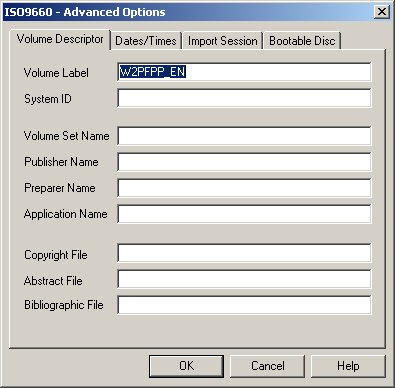
Now, click on the Advanced Options box (it's in the middle). In the Volume Descriptor screen, type in the CD's name in the Volume Label field (in Win2K Pro's case it's W2PFPP_EN, for Win2k Adv Serv it's W2ASEL_EN).
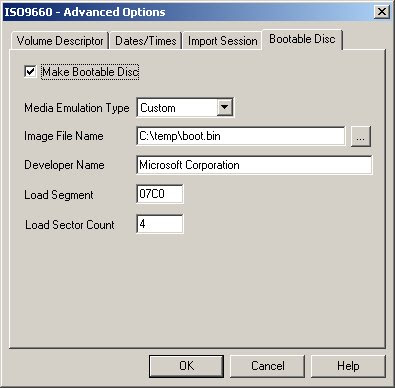
Next, click on the Bootable Disc tab. Enter the exact values listed here, only difference will be the location you saved the boot.bin file to. Make sure you set "Load Sector Count" to 4!!!. That one step gets people every time.
Now click OK, and you're back to the main burning options screen. From here you click the Start button to burn your CD (or make the image file if you chose to do so instead). I also recommend clicking the Save Settings box, so it'll remember these settings for you.

0 comments:
Post a Comment